Make Snapshot
If you have a very long action it might be advisable to start the
action with a snapshot. This will allow you to undo the entire
action in the event the action does not produce the desired results.
A snapshot is the recording of the current state of an image.
- To make a snapshot click on the middle icon at the bottom of the history palette.
- By clicking on a snapshot in the history palette the image
will revert to the state of the image at the time the snapshot was
recorded. This includes all adjustments that was made, all layers
with the layer settings in place, etc.
- If several snapshots exist you may bring up the state of any of them.
- A snapshot may be deleted by dragging it to the trash bin.
- When you activate a snapshot you may then continue editing. All previous history items will then be deleted.
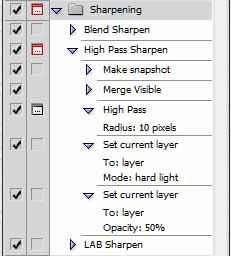
Filling in information during the play
Once an action has been recorded you may wish to have that action stop
during play to fill out a dialog box on the fly rather than letting a
default value take effect every time. By clicking on the second
column in the action palette beside an event when the action gets to
that event a dialog box will come up and you will be given the
opportunity to complete the dialog. When you finish the action
will continue. In the example on the right the "High Pass" event,
significying the application of the high pass filter, has a dialog icon
in the second column. When the action gets to the High Pass event
the action will stop and the Radius can be set as desired.
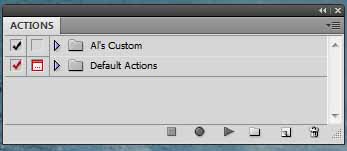
The first column of the Actions Palette defaults to each box being
checked. If a box in the first column is unchecked the associated
event will be skipped when the action is played.
Editing an Action
- An event within an action may be deleted by dragging that action to the trash bin.
- The order of actions can be changed by dragging an event up or down within the action.
- An event within an action can be modified by double
clicking on the event. The dialog box associated with that event
will come up and it may be filled in as desired. Note: When
doing this that event will be applied to the current image.
- A new event (or events) may be added by highlighting an
event then in the Actions Menu select Start Recording. Any new
events will be inserted after the selection. Click on Stop
Recording when finished.
- If an action title is highlighted and Action Options is
selected in the Action Menu then you may reset the action properties
(name, function keys, and color -- which appears in the Button Mode.
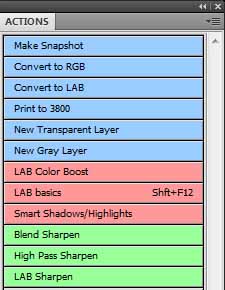
Button Mode
When the button mode is selected the Actions Palette will appear as it
does in the left image. To play an action simply click on the
action icon. This is a simple one-click way of making your
actions available.
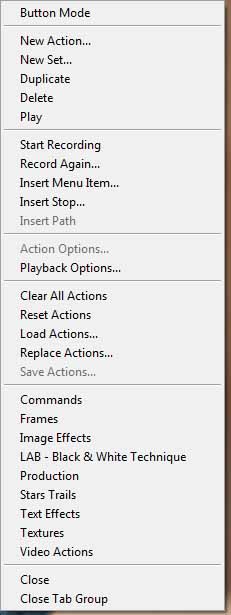
Saving and Loading an Action Set
- An action set may be saved for import into another
computer. To do this highlight the action set, go to the actions
menu, then select Save Actions. You may then deterring the folder
into which you wish to save the actions. The default file name
will be ActionSetName.atn.
- You may now transfer the action file to another computer
that has Photoshop installed on it. To bring the actions into
Photoshop use the actions menu, select "Load Actions" and chose the
action file you wish to load. Alternatively you may simply double
click on the action file (ie. ActionSetName.atn)
- Actions may be loaded into Photoshop Elements beginning
with Elements 8. However, the actions must be recorded in a
version of Photoshop CS. When doing so be careful not to use a
feature of Photoshop CS that is not available in Photoshop Elements.
- Actions may be purchased or, in many cases, simply downloaded for free from the Internet.
|
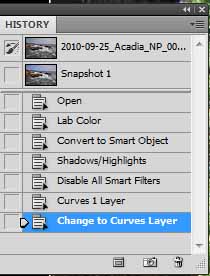
History Palette
High Pass Sharpening Action
Actions Palette
 Button Mode
Actions Palette
|