How to Create a Home page at Illinois College
-
Set your IllinoisCollege NT directory to contain a web site.
Have Academic Computing create a directory on "clio" for your web pages.
-
Log into your IllinoisCollege account. Use the same user ID as you
do to check your Illinois College mail.
-
Click on the "Your Computer" icon
-
You should have listed a drive W which will be your directory (whose name
is based on your last name) on the computer "clio".
-
Your web address (URL) will be http://clio.ic.edu/students/LastName
Note:
LastName is your directory on the computer "clio".
Note: The above instructions will work for students. Faculty and
staff will have slightly different web directories and URLs.
-
Use Netscape Composer to create your home page. This home
page must have the filename "index.html". We will create this home
page on a floppy drive. Before you are done you will need to transfer
the contents of the floppy drive to the W: directory in your Illinois College
account. It is recommended
 that
if you are going to maintain a web site that you keep all of your web files
on a floppy disk that is being used for only that purpose. This floppy
disk will be your backup copy of your web site. Note: It is the purpose
of these instructions to get you to create a simple home page. Once
you understand the process, you may change things as you wish.
that
if you are going to maintain a web site that you keep all of your web files
on a floppy disk that is being used for only that purpose. This floppy
disk will be your backup copy of your web site. Note: It is the purpose
of these instructions to get you to create a simple home page. Once
you understand the process, you may change things as you wish.
-
Bring up Netscape Communicator.
-
On the main menu chose file - new - blank page. This
will bring up a blank page in Netscape Composer.
-
If composer is using the default settings the formatting toolbar will be
the last row at the top of the screen. In the formatting toolbar,
chose "heading 1" as your paragraph style (the drop-down menu on the left.)
-
Again in the formatting toolbar, chose center alignment. Use the
far right icon, and chose the "center" icon.
-
Type in a header for your home page. You might use your own name
here.
-
When you press the return key the paragraph style will return automaticly
to "normal". That is OK, but you probably will want to return the
alignment to "left" using the alignment icon.
-
Type in a paragraph of information.
-
After you have inserted your information choose H. Line from the composition
toolbar (in the default settings, this will be just above the formatting
toolbar). This will put a horizontal line across your web page to
separate this part from other parts. This is only for looks.
-
Save your web page to w:\index.html -- It is important that
you use this file name. It is the default file name that the web
server is looking for. Otherwise you would have to add the file name
after the rest of your URL. If you save your web page file as MyFile.html
then your URL would be http://clio.ic.edu/students/LastName/MyFile.html
-
View your home page in the Netscape Navigator. This will let
you see exactly how your home page will look when others view it through
Netscape. When both the Navigator (viewer) and the Composer (editor)
are up you can switch back and forth using the Windows 95 task bar at the
bottom of the screen.
-
Chose File - Open Page.
-
Click on choose file.
-
Type in w:\index.html
-
Click open
-
Alternatively, you can click on the Preview button of the composition toolbar.
You should now be viewing your newly created page in the Netscape Navigator.
This will be useful in seeing what your page will really look like.

-
Insert an image into your home page. One of the things that
makes the World Wide Web so popular is the ability to integrate images
along with the text information. You can put photographs and other
graphics in your web page. To convert from a photograph to a computer
graphic you need a scanner. However, even without a scanner you can
capture the graphics from other web pages that exist on the web.
-
To capture a photo (or any other graphic) first right click with
your mouse on the image (practice with an image on this page.) This
will bring up a popup menu.
-
choose "save image as ..."
-
Save your image to your floppy disk (or, if at home, to any directory you
wish.) You may keep the name that is given or change it to what ever
you wish. Under any case, be sure to keep the same extension on the
image file. The extension with, almost always, be either .jpg or
.gif -- these are the primary graphics formats for the web.
-
Go back to your home page in the Composer. Get your cursor to after
the line across the page. From the composition toolbar choose
Image.
This will bring up the Image Properties window.
-
Select Choose File ... Then select
the graphics file you have just saved.
-
In the "Text alignment and wrapping around images" section select the item
of your choice. The graphics on this page use the far right icon.
-
Press the "Alt Text/LowRes" button. In the Alternate Text section
type a short phrase that indicates what your photo is. This will
appear on the screen while the image is loading. It will also appear
briefly whenever the mouse is above the photo.
-
Click the OK button on the Image Properties window. You will then
exit the Image Properties window. The photo you have selected should
be in your home page.
-
Save your home page with the save button on the composition toolbar, then
view it in the Navigator. You probably will need to press the Reload
button in the Navigator to view your changes.
-
Change the properties of your web page. A web page has a number
of properties that the web page designer can control. Among the most
important of these are the title, the background color, and the background
image. You can change these in Composer with the Page Properties
editor.
-
First capture a background image. Find a web page using Navigator
that has a background that you like (Use this page for practice.)
-
Right click on any portion of the page that does not have
any other clickable attribute. (A blank portion of the page is usually
good.)
-
Choose the last menu item, "save background as ... ". Save the file
to your floppy disk. Be sure to remember the name of the file.
-
Back in Composer, from the main menu select "Format" then "Page Color and
Properties". This will bring up the Page Properties editor.
-
If it is not already in view, click on the "General" tab at the top of
the Page Properties editor.
-
Type in a title for your page. When viewed you someone else this
title will appear in the title bar at the top of their browser.
-
Click on the "Colors and Background" tab.
-
Change the colors as you wish by clicking on the color tag in the left
column and selecting a color. You may also choose one of the built
in color schemes.
-
Under "background image" choose "Choose File". Select the file you
saved on the A: drive. This will become your background image.
-
Click OK in the Page Properties editor. Save your web page and view
the changes.
-
Insert a link to another page on your home page.
 It
was stated above that one of the things that made the WWW popular was the
ability to put graphics into web pages. The thing that makes the
WWW posible is the ability to insert links from one web page that will
cause the browser to go to another web page. This makes the WWW one very
large web site with links connecting each and every web page in the site.
To be a part of this you must link your pages to other web sites and to
your other pages. This section will help you link to the United
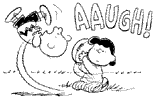
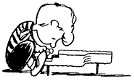
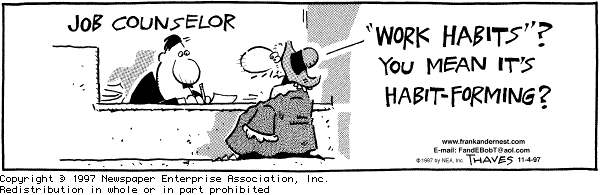
Media Comic Strip site. This includes many comic strips, including
Peanuts, Frank and Earnst, and Alley Oop.
It
was stated above that one of the things that made the WWW popular was the
ability to put graphics into web pages. The thing that makes the
WWW posible is the ability to insert links from one web page that will
cause the browser to go to another web page. This makes the WWW one very
large web site with links connecting each and every web page in the site.
To be a part of this you must link your pages to other web sites and to
your other pages. This section will help you link to the United
Media Comic Strip site. This includes many comic strips, including
Peanuts, Frank and Earnst, and Alley Oop.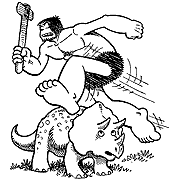
-
At the location where you wish your link type in a phrase indicating your
link. An example would be
United Media Comic Strip -- view a month's worth
of comic strips for free!
-
Highlight the portion of that phrase that you wish the view to click on.
In this case, click on "United Media Comic Strip"
-
In the composition toolbar, click on "Link". The Character Properties
editor will come up with the page Link.
-
Under "linked text" your highlighted text will be shown.
-
Under "link to" type in the web address (URL) of the web page to be linked.
In this case type
http://www.unitedmedia.com/comics/
-
Click OK, save your web page and view it. You should now be able
to click on the link and reach the web page to which you have linked.
-
Insert an e-mail link onto your home page. You can also set
links that will allow the viewer of your web page to send e-mail to you.
This is called an e-mail link. You do this the same way as a web
page link except that you use a "mailto:" protocol instead of an "http://"
protocol and you use an e-mail address instead of a web address.
The example here will have the viewer send a message to yourself.
This is commonly placed at the bottom of a web page.
-
Type out type phrase you wish to use to indicate to the viewer how to contact
you. Frequently the e-mail address itself is used as the link text.
You could also use your own name as the link text. An example is:
Contact me at yourname@hilltop.ic.edu
-
Highlight the link text. Then click on "Link" in the composition
toolbar.
-
Type in the "link to" edit box mailto: (don't forget the colon) followed
by the e-mail address to be linked. An example:
mailto:yourname@hilltop.ic.edu
-
Click OK, save your web page and view it. If you click on your mailto
link the Netscape mail composition window should appear with the mailto
address already in the To: position on the form. You can close that
window without sending the message.
-
Create additional pages for your web site. You will probably
want pages in your web site other than your home page. You can create
these just like you did your home page, save it to your floppy disk (don't
use the same name) then create links from your home page to your new pages
(or from new pages to other new pages.) These instructions will help
you create a page called friends and link to this page from your home page.
-
Create a new web page just as you did your home page. Include a header,
title, background, links, and any graphics you want. Save it as friends.htm
-
Open your home page (that is on your floppy disk) using Netscape Composer.
-
Whereever within your home page that you wish to place the link to your
"friends" page, type in the link text and other text directing the viewer
to this page. An example would be:
To get to know my friends visit my Friends Page
-
Highlight the link text. In this case it would likely be "Friends
Page"
-
Click on "Links" in the composition toolbar.
-
Type "friends.htm" in the "link to" edit box. (Do not type the quotes!)
You may also select this file using the "choose file" button.
-
Click OK and view your home page in the Navigator. You should now
be able click on your new link and bring up your new "friends" page.

Author: Albert
L. Crawford It is hoped that you are able to get some use
from this document. If you use it to help yourself create a web page
please send me an e-mail message with your web address (URL). Web
address: http://www.CrawfordEnterprise.com.
E-mail address is Albert@CrawfordEnterprise.com